Sterilizing Bottle-Feeding Equipment: A Comprehensive Guide for Parents
Hello, dear parents! If you’re here, it’s because you’ve embarked on the incredible journey of raising a little one, and you’re determined to provide them with the safest and healthiest start in life. One crucial aspect of baby care is ensuring that your bottle-feeding equipment is squeaky clean and free from harmful germs. In this extensive guide, I’m going to walk you through everything you need to know about sterilizing your baby’s bottles, nipples, and more. Get ready to become a sterilizing pro!
Introduction: The Importance of Sterilizing Baby Bottles
Before we dive into the nitty-gritty of sterilization, let’s understand why it’s so crucial for your baby’s health and well-being.
Why Sterilization Matters
- Protection Against Infections: Babies have delicate immune systems. Sterilizing bottle-feeding equipment helps safeguard them against harmful bacteria that can lead to infections and illnesses.
- Peace of Mind: Sterilization provides parents with peace of mind, knowing that their baby’s feeding equipment is as clean and safe as possible.
Part 1: Getting Started with Sterilization
1. Types of Sterilization Methods
There are several methods for sterilizing baby bottles and equipment. Let’s explore the most common ones:
Boiling Water Method
- Pros: Simple, effective, and doesn’t require special equipment.
- Cons: Time-consuming and can damage certain bottle materials over time.
The boiling water method is a classic and straightforward way to sterilize your baby’s bottles and equipment. Here’s how to do it:
- Wash bottles and equipment in hot, soapy water.
- Place them in a large pot of boiling water, ensuring they are fully submerged.
- Boil for at least 5 minutes, then use sterilized tongs to remove items.
Steam Sterilizers
- Pros: Quick, efficient, and user-friendly.
- Cons: Requires an initial investment in a steam sterilizer.
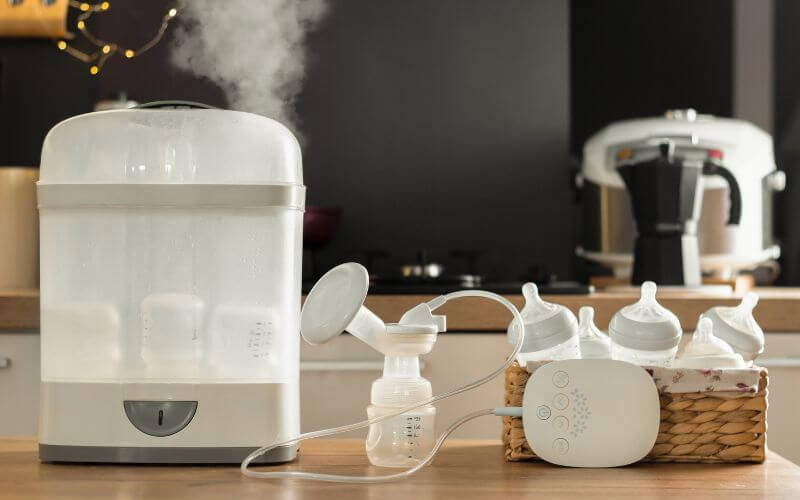
Steam sterilizers are electric devices designed for sterilizing baby bottles and accessories. Here’s how to use them:
- Follow the manufacturer’s instructions for your specific sterilizer.
- Typically, add a small amount of water, load the equipment, and start the sterilization cycle.
Microwave Sterilization
- Pros: Fast and convenient, especially for travel.
- Cons: Requires a microwave and specific microwave-safe sterilizing bags or equipment.
Microwave sterilization is a speedy and efficient way to ensure your baby’s bottles are free from harmful germs. Here’s how to do it:
- Wash bottles and equipment in hot, soapy water.
- Place them in a microwave-safe sterilizing bag or container with a small amount of water.
- Follow the microwave’s instructions for sterilizing.
2. Sterilizing Equipment
Before you begin, ensure you have the following equipment on hand:
- Bottles: Glass or BPA-free plastic bottles.
- Nipples: Ensure they are suitable for sterilization (some silicone nipples can’t withstand high temperatures).
- Bottle Brush: For thorough cleaning before sterilization.
- Tongs: To handle sterilized items without contaminating them.
3. Step-by-Step Sterilization Guide
Here’s how to sterilize baby bottles and equipment effectively:
Boiling Water Method
- Wash bottles and equipment in hot, soapy water.
- Place them in a large pot of boiling water, ensuring they are fully submerged.
- Boil for at least 5 minutes, then use sterilized tongs to remove items.
Steam Sterilizers
- Follow the manufacturer’s instructions for your specific sterilizer.
- Typically, add a small amount of water, load the equipment, and start the sterilization cycle.
Microwave Sterilization
- Wash bottles and equipment in hot, soapy water.
- Place them in a microwave-safe sterilizing bag or container with a small amount of water.
- Follow the microwave’s instructions for sterilizing.
Part 2: Maintaining Sterilized Equipment
Sterilization isn’t a one-and-done process; it requires ongoing maintenance to keep your baby’s feeding items safe and clean.
1. Storage
- Store sterilized bottles and equipment in a clean, covered container or on a disinfected surface to prevent contamination.
2. Avoid Touching
- Refrain from touching the inside of bottles and nipples after sterilization to keep them germ-free.
Part 3: Troubleshooting Sterilization Concerns
Sometimes, despite your best efforts, issues may arise during the sterilization process. Here’s how to address common concerns:
1. Cloudy Bottles
- Cloudiness can occur due to mineral deposits in your water. Use distilled water for sterilization to prevent this issue.
2. Bottle Warping
- High heat can cause some bottle materials to warp. Opt for BPA-free plastic bottles, which are less likely to be affected.
Conclusion: Sterilization Mastery for a Healthy Baby
Sterilizing baby bottles and equipment may seem like a daunting task at first, but with the right knowledge and tools, you can become a sterilization pro. Your baby’s health and safety are paramount, and by following these guidelines, you’ll ensure that every mealtime is a clean and germ-free experience.
So, embrace the art of sterilization, keep those bottles pristine, and savor the joy of watching your little one thrive, grow, and develop in a safe and loving environment.
Share This Story, Choose Your Platform!



Latest Post


Latest News To Your Inbox
Subscribe to hear about our latest blog posts, competitions and special offers.